Domoticz OpenTherm Thermostat
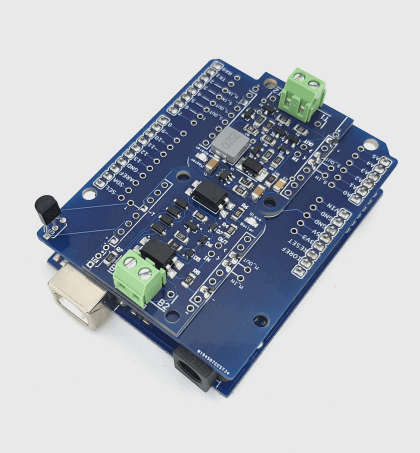
This article describes how to build a simple OpenTherm Wi-Fi thermostat using ESP8266 Thermostat Shield. So you can integrate your heating control into your Domoticz home automation system.
What is Domoticz?
Domoticz is a very light weight home automation system that lets you monitor and configure miscellaneous devices, including lights, switches, various sensors/meters like temperature, rainfall, wind, ultraviolet (UV) radiation, electricity usage/production, gas consumption, water consumption and many more. Notifications/alerts can be sent to any mobile device.
Environment setup
Domoticz can be installed on a different devices, please refer to the wiki on how to install and make initial configuration of your instance. For our purposes we will use a windows installation. It is as simple as downloading and running installer wizard similar to most of regular windows apps. Also you'll need MQTT broker installed.
Once you have got Domoticz up and running you'll need to configure MQTT adapter and smart virtual thermostat.
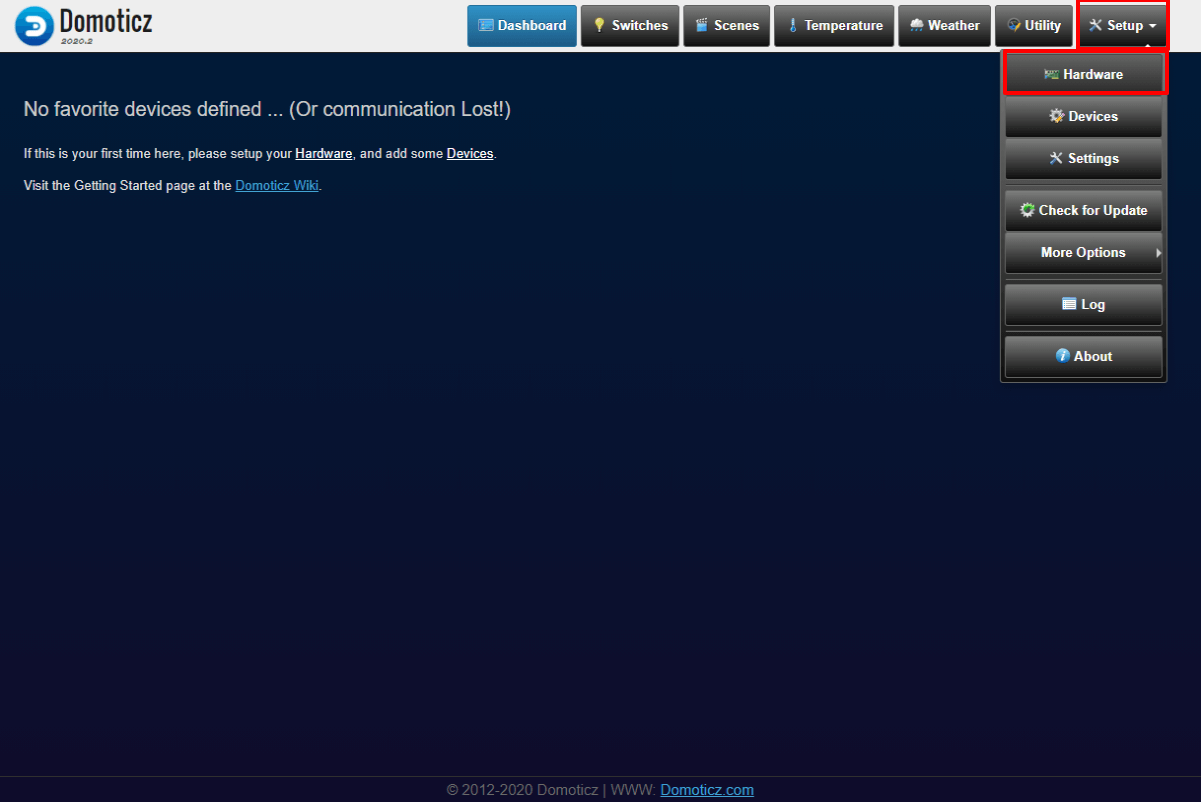
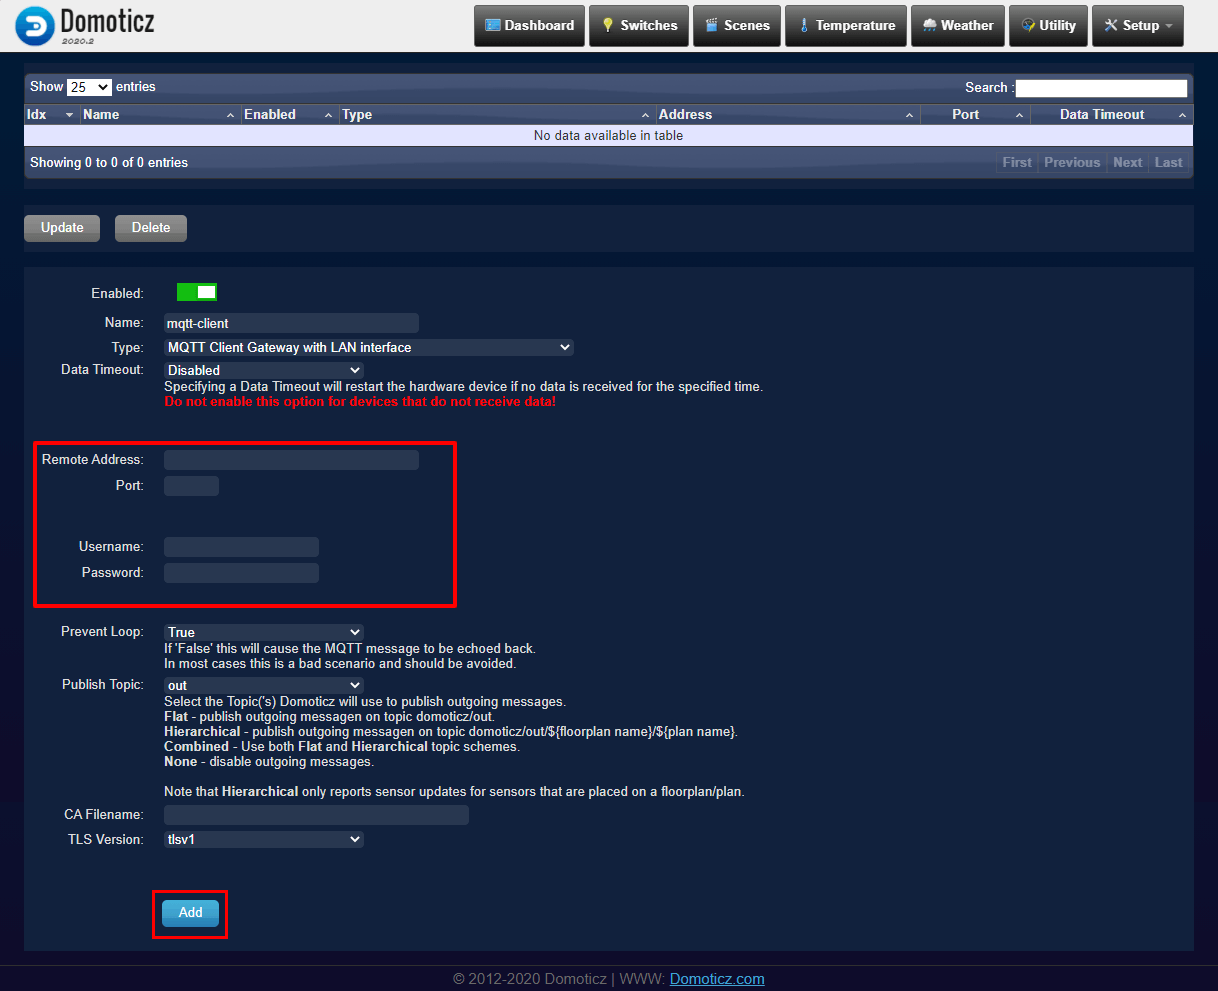
- Go to your domoticz server web interface (http://127.0.0.1:8083 for our example) and select 'Devices' - 'Hardware' from menu
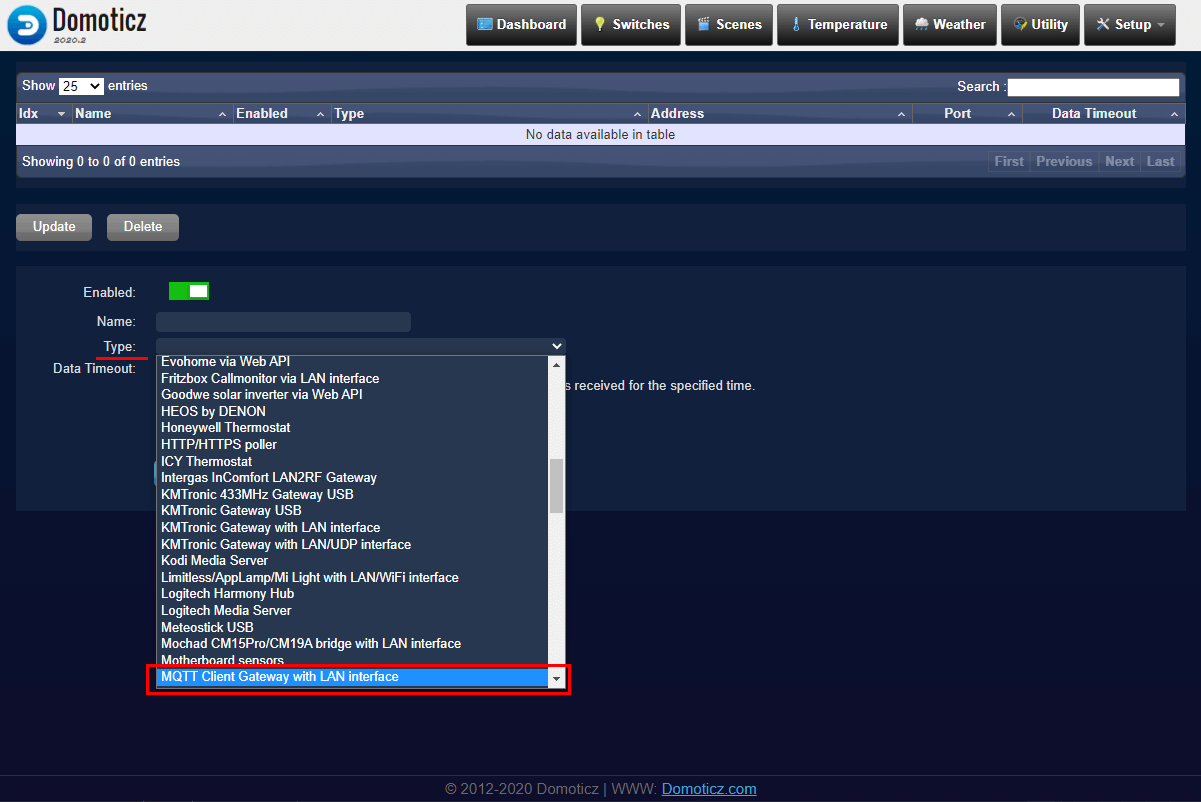
- Specify some name, i.e. 'mqtt-client'
- Select 'MQTT Client Gateway with LAN interface'
- Specify 'Remote Address', 'Port', 'Username' and 'Password' fields according to your MQTT broker installation
- Press 'Add' button
For a Smart Virtual Thermostat plugin installation please refer to the manual page.
In our example (windows domoticz installation) please proceed the following steps:
- Download plugin from git repo (Press green 'Code' button and click 'Download ZIP')
- Extract downloaded archive contents to 'C:\Program Files (x86)\Domoticz\plugins\' folder A 'C:\Program Files (x86)\Domoticz\' folder might not contain 'plugins', so you have to create it first
- Rename 'SmartVirtualThermostat-master' folder to 'SVT'
- Restart domoticz server
- Go to your domoticz server web interface (http://127.0.0.1:8083 for our example) and select 'Devices' - 'Hardware' from menu
- Specify some name, i.e. 'smart-thermostat'
- Select 'Smart Virtual Thermostat'
- Press 'Add' button
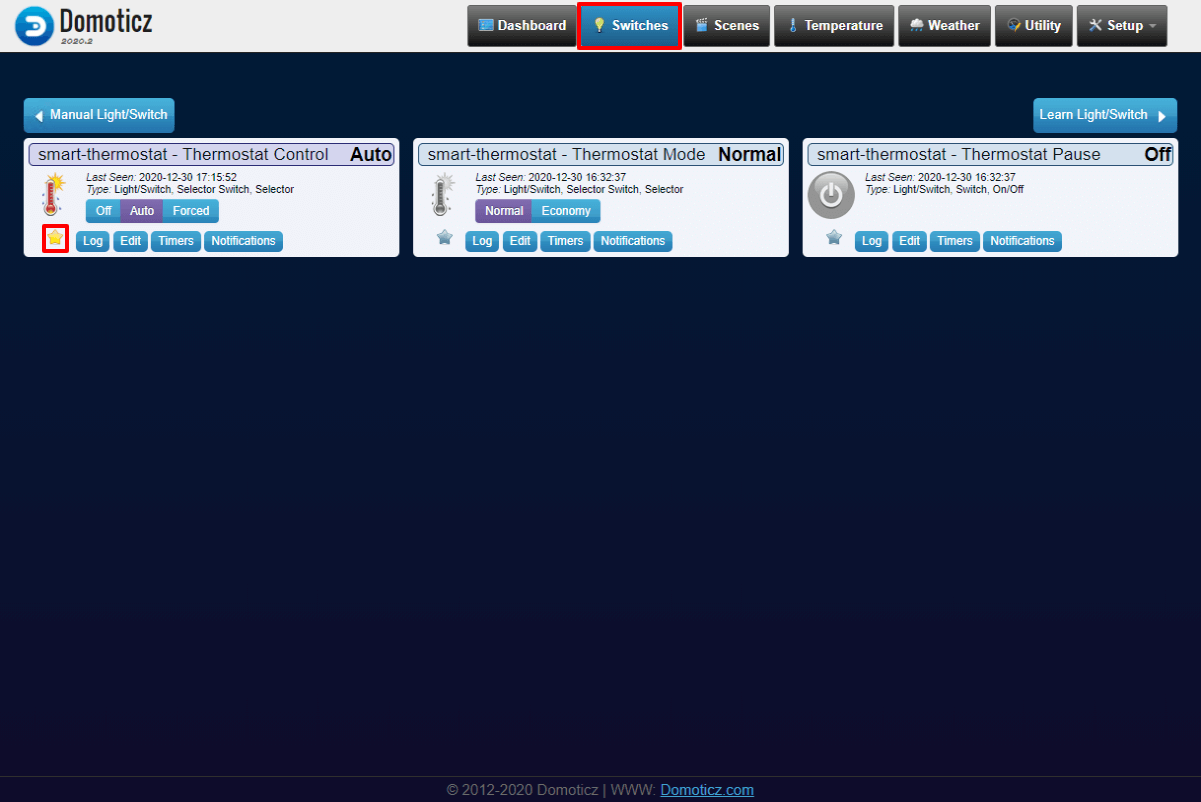
- Go to Switches page and click on star icon for smart-thermostat Thermostat Control card
- Repeat step above for smart-thermostat Setpoint Normal card on Utility tab
- Now please navigate to the 'Setup-Devices' domoticz tab and note an id's created for your sensors, they will be needed for a proper sketch configuration. Especially you'll need smart-thermostat - Setpoint Normal and smart-thermostat - Thermostat Control ones
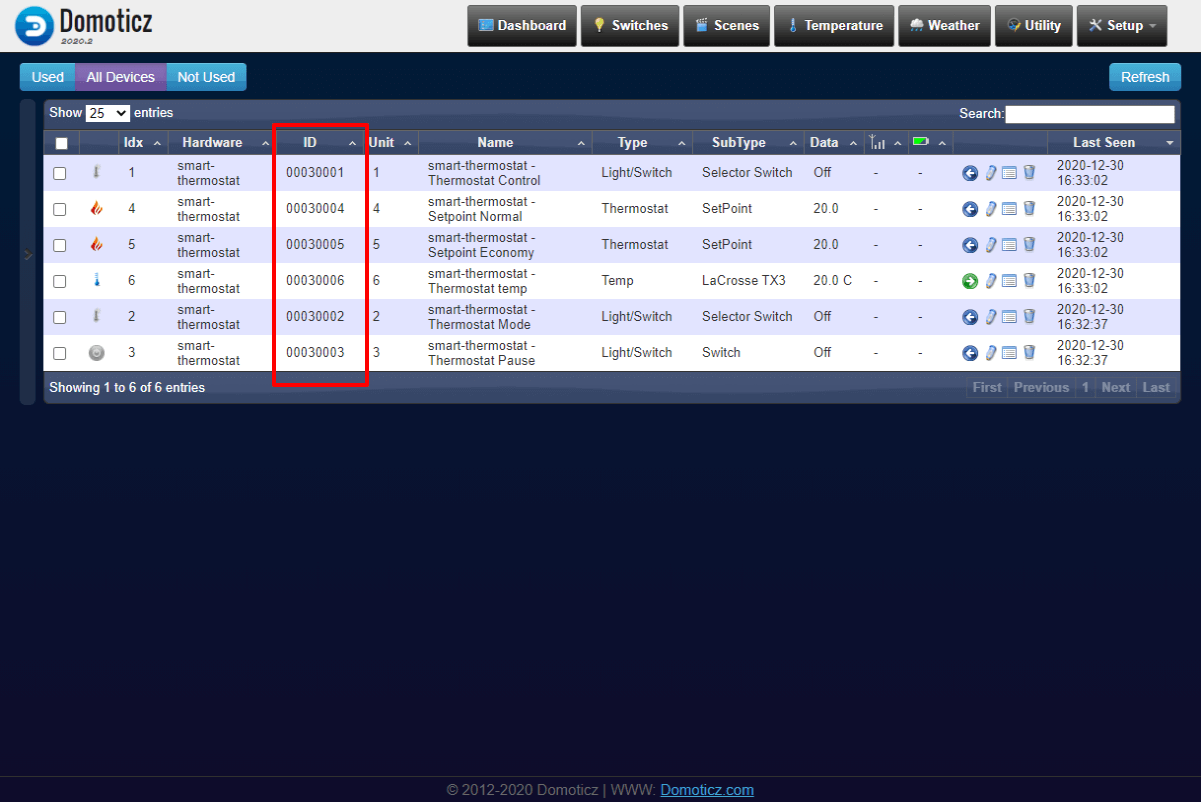
Now you have dashboard configured with cards needed to control your opentherm thermostat
Arduino IDE libraries installation
- Install ArduinoJson library
- Install PubSubClient library
- Install Ihor Melnyk's OpenTherm library
- Install DallasTemperature and OneWire library
In case you forgot, or don't know how to install Arduino libraries click here.
Domoticz OpenTherm Thermostat Sketch
- Create new sketch in Arduino IDE and copy code below.
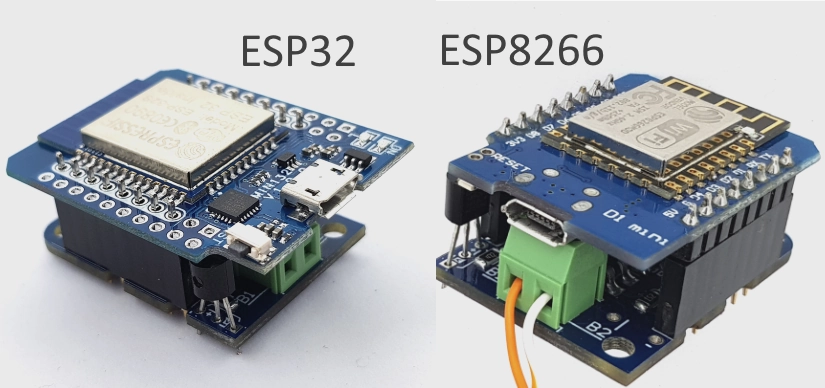
- Specify WI-FI SSID, WI-FI password and update pins configuration if you want to use ESP32 module.
- Replace 'xxx' in SETPOINT_NORMAL_ID, CONTROL_ID with ids of smart-thermostat - Setpoint Normal and smart-thermostat - Thermostat Control respectively
- Connect WeMos D1 Mini or WeMos D1 Mini ESP32 module and upload updated sketch.
Alternatively you can download sketch from a github repo
#include <ESP8266WiFi.h>
#include <OneWire.h>
#include <DallasTemperature.h>
#include <PubSubClient.h>
#include <ArduinoJson.h>
#include <OpenTherm.h>

// Your WiFi credentials.
// Set password to "" for open networks.
const char* ssid = "xxxxxx";
const char* pass = "xxxxxx";

// Your MQTT broker address and credentials
const char* mqtt_server = "xxx.xxx.xxx.xxx";
const char* mqtt_user = "xxxxxx";
const char* mqtt_password = "xxxxxx";
const int mqtt_port = 1883;

// Master OpenTherm Shield pins configuration
const int OT_IN_PIN = 4;  //for Arduino, 4 for ESP8266 (D2), 21 for ESP32
const int OT_OUT_PIN = 5; //for Arduino, 5 for ESP8266 (D1), 22 for ESP32

// Temperature sensor pin
const int ROOM_TEMP_SENSOR_PIN = 14; //for Arduino, 14 for ESP8266 (D5), 18 for ESP32

const char* OUT_TOPIC = "domoticz/out";
const char* IN_TOPIC = "domoticz/in";

const String SETPOINT_NORMAL_ID = "xxxxxx";
const String CONTROL_ID = "xxxxxx";


const unsigned long statusUpdateInterval_ms = 1000;

float  sp = 15, //set point
       t = 15, //current temperature
       t_last = 0, //prior temperature
       ierr = 25, //integral error
       dt = 0, //time between measurements
       op = 0; //PID controller output
unsigned long ts = 0, new_ts = 0; //timestamp
unsigned long lastUpdate = 0;
unsigned long lastTempSet = 0;

bool heatingEnabled = true;

#define MSG_BUFFER_SIZE  (50)
char msg[MSG_BUFFER_SIZE];

OneWire oneWire(ROOM_TEMP_SENSOR_PIN);
DallasTemperature sensors(&oneWire);
OpenTherm ot(OT_IN_PIN, OT_OUT_PIN);
WiFiClient espClient;
PubSubClient client(espClient);

void ICACHE_RAM_ATTR handleInterrupt() {
  ot.handleInterrupt();
}

float getTemp() {
  return sensors.getTempCByIndex(0);
}

float pid(float sp, float pv, float pv_last, float& ierr, float dt) {
  float KP = 10;
  float KI = 0.02;
  // upper and lower bounds on heater level
  float ophi = 63;
  float oplo = 20;
  // calculate the error
  float error = sp - pv;
  // calculate the integral error
  ierr = ierr + KI * error * dt;
  // calculate the measurement derivative
  //float dpv = (pv - pv_last) / dt;
  // calculate the PID output
  float P = KP * error; //proportional contribution
  float I = ierr; //integral contribution
  float op = P + I;
  // implement anti-reset windup
  if ((op < oplo) || (op > ophi)) {
    I = I - KI * error * dt;
    // clip output
    op = max(oplo, min(ophi, op));
  }
  ierr = I;

  Serial.println("sp=" + String(sp) + " pv=" + String(pv) + " dt=" + String(dt) + " op=" + String(op) + " P=" + String(P) + " I=" + String(I));

  return op;
}

// This function calculates temperature and sends data to MQTT every second.
void updateData()
{
  //Set/Get Boiler Status
  bool enableHotWater = true;
  bool enableCooling = false;
  unsigned long response = ot.setBoilerStatus(heatingEnabled, enableHotWater, enableCooling);
  OpenThermResponseStatus responseStatus = ot.getLastResponseStatus();
  if (responseStatus != OpenThermResponseStatus::SUCCESS) {
    Serial.println("Error: Invalid boiler response " + String(response, HEX));
  }

  t = getTemp();
  new_ts = millis();
  dt = (new_ts - ts) / 1000.0;
  ts = new_ts;
  if (responseStatus == OpenThermResponseStatus::SUCCESS) {
    op = pid(sp, t, t_last, ierr, dt);
    ot.setBoilerTemperature(op);
  }
  t_last = t;
  sensors.requestTemperatures(); //async temperature request
  Serial.println("Current temperature: " + String(t) + " °C ");
}

String convertPayloadToStr(byte* payload, unsigned int length) {
  char s[length + 1];
  s[length] = 0;
  for (int i = 0; i < length; ++i)
    s[i] = payload[i];
  String tempRequestStr(s);
  return tempRequestStr;
}

DynamicJsonDocument doc(768);

void callback(char* topic, byte* payload, unsigned int length) {
  Serial.println("Callback");

  const String topicStr(topic);
  String payloadStr = convertPayloadToStr(payload, length);

  deserializeJson(doc, payloadStr);

  const String id((const char*)doc["id"]);

  Serial.println("Received, id=" + id);

  if (id == SETPOINT_NORMAL_ID) {
    const String targetTemp((const char*)doc["svalue1"]);
    sp = targetTemp.toFloat();
  }
  else if (id == CONTROL_ID) {
    const String targetMode((const char*)doc["svalue1"]);
    Serial.println("Set mode " + targetMode);
    if (targetMode == "0")
      heatingEnabled = false;
    else if (targetMode == "10" || targetMode == "20")
      heatingEnabled = true;
    else
      Serial.println("Unknown mode");
  }

  doc.clear();
}

void reconnect() {
  // Loop until we're reconnected
  while (!client.connected()) {
    Serial.print("Attempting MQTT connection...");
    const char* clientId = "opentherm-thermostat-test";
    if (client.connect(clientId, mqtt_user, mqtt_password)) {
      Serial.println("ok");

      client.subscribe(OUT_TOPIC);
      client.setBufferSize(1024);
    } else {
      Serial.print(" failed, rc=");
      Serial.print(client.state());
      Serial.println(" try again in 5 seconds");
      // Wait 5 seconds before retrying
      delay(5000);
    }
  }
}

void setup()
{
  Serial.begin(115200);

  Serial.println("Connecting to " + String(ssid));
  WiFi.mode(WIFI_STA);
  WiFi.begin(ssid, pass);

  int deadCounter = 20;
  while (WiFi.status() != WL_CONNECTED && deadCounter-- > 0) {
    delay(500);
    Serial.print(".");
  }

  if (WiFi.status() != WL_CONNECTED) {
    Serial.println("Failed to connect to " + String(ssid));
    while (true);
  }
  else {
    Serial.println("ok");
  }

  client.setServer(mqtt_server, mqtt_port);
  client.setCallback(callback);

  ot.begin(handleInterrupt);

  //Init DS18B20 sensor
  sensors.begin();
  sensors.requestTemperatures();
  sensors.setWaitForConversion(false); //switch to async mode
  t, t_last = getTemp();
  ts = millis();
}

void loop()
{
  if (!client.connected()) {
    reconnect();
  }
  client.loop();

  unsigned long now = millis();
  if (now - lastUpdate > statusUpdateInterval_ms) {
    lastUpdate = now;
    updateData();
  }
}
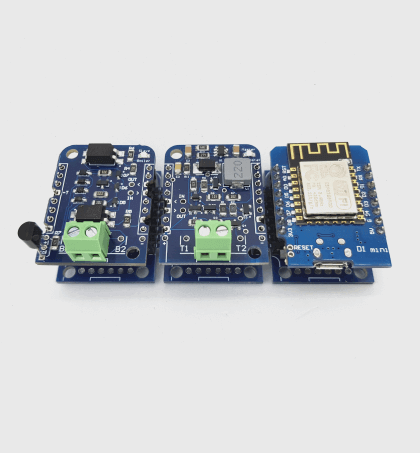
Put all things together

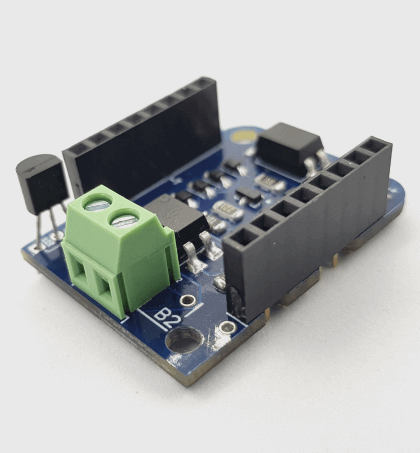
- Use 2-pins screw therminal to connect ESP8266 Thermostat Shield to the boiler.
- Connect micro-USB cable
Domoticz UI in action