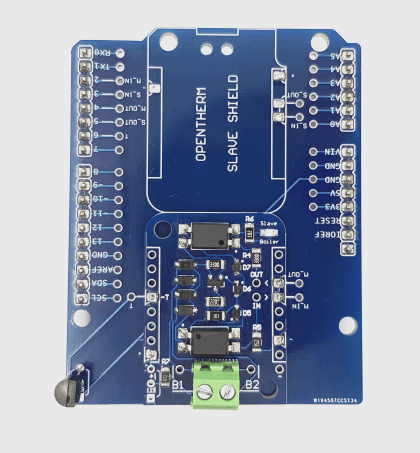
ESPHome OpenTherm Thermostat
In today’s smart home revolution, thermostats play a key role in optimizing energy use and maintaining comfort. While there are plenty of ready-made options, building your own thermostat is an exciting alternative. The DIYLESS Thermostat offers a perfect blend of flexibility and affordability, making it an excellent choice for enthusiasts. When paired with the versatility of ESPHome firmware, it unlocks endless possibilities for customization, ideal for tech-savvy DIYers.
ESPHome makes it easy to manage your microcontrollers using simple yet powerful configuration files, seamlessly integrating them with your home automation system for remote control. In this blog post, we’ll guide you through setting up a DIYLESS Thermostat with custom ESPHome firmware and explore its standout features.
Materials You’ll Need
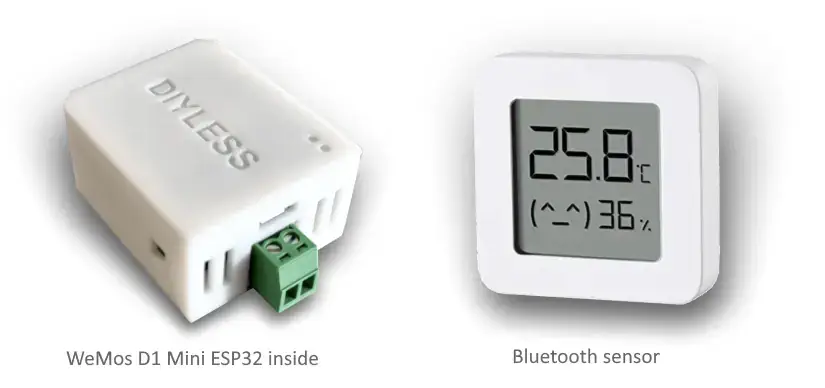
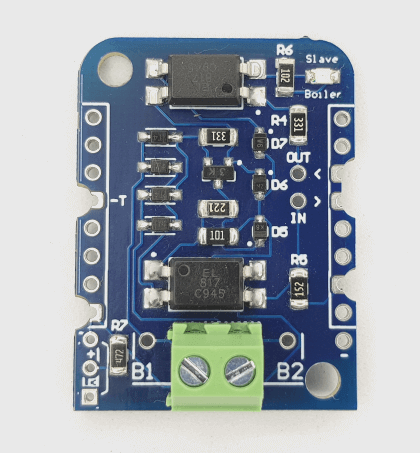
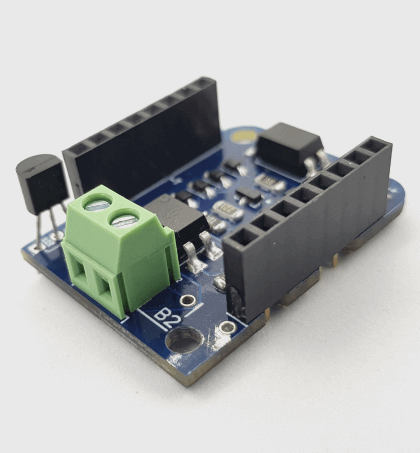
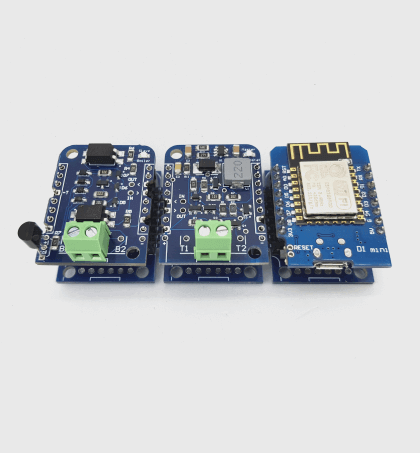
If you're a DIY electronics enthusiast, you can build an OpenTherm thermostat using the Master OpenTherm Shield, a DALLAS DS18B20 temperature sensor, or a Bluetooth sensor, combined with a WeMos D1 mini ESP32 module. Assembly is straightforward: solder headers onto the modules, then stack them together.
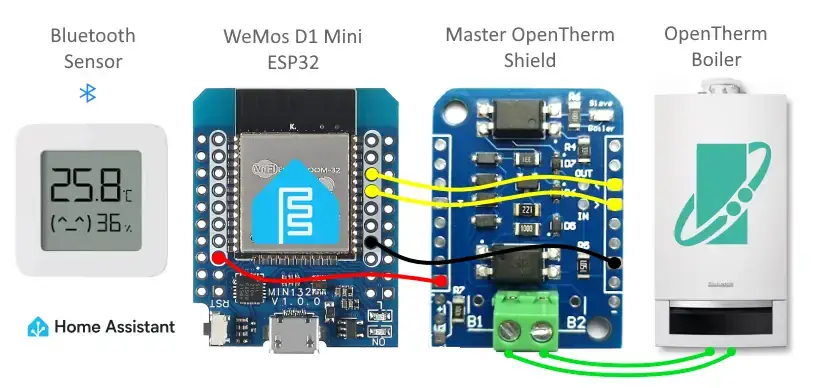
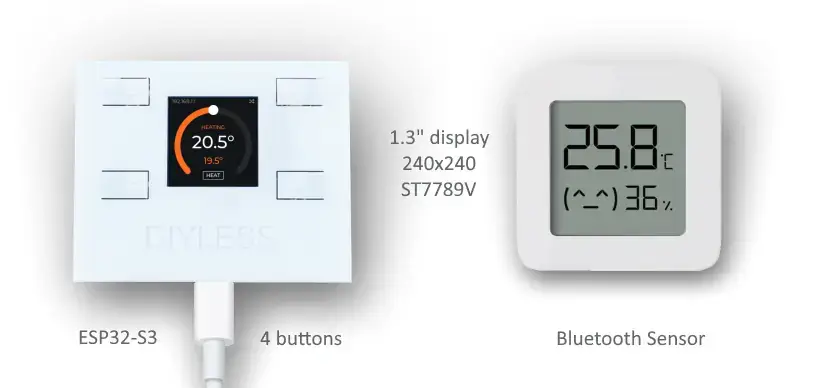
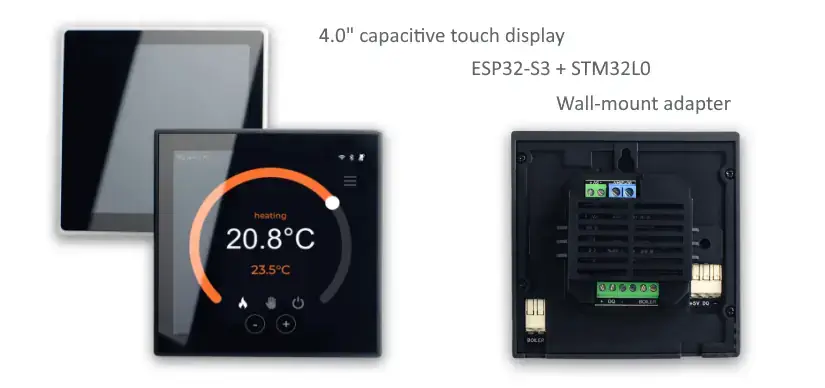
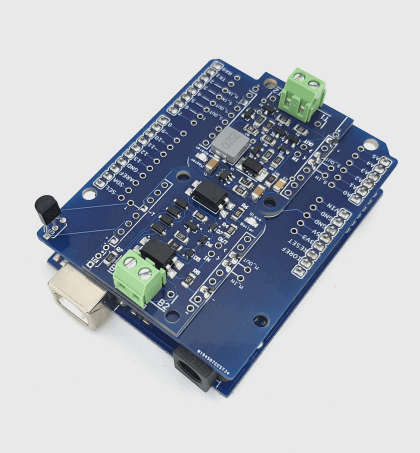
If soldering isn’t your thing, don’t worry! You can opt for one of the preassembled, ready-to-use DIYLESS thermostats. These thermostats allow you to flash your custom ESPHome firmware right out of the box, saving you time and effort. Currently, there are three ready-to-use options available:
Choose the option that suits your skill level and needs, and let’s get started!
ESPHome Configuration
The easiest way to set up ESPHome on your device is by using the ESPHome Device Compiler, a Home Assistant add-on. ESPHome simplifies turning your microcontrollers into smart home devices by allowing you to write YAML configuration files that define the device’s behavior. It compiles these configurations into custom firmware, which you can flash directly onto your hardware. Once configured, any sensors or devices you define will automatically appear in Home Assistant’s interface, making integration seamless.
For detailed setup instructions, refer to the Installing ESPHome Device Compiler guide.
- Install the Add-On: Add the ESPHome Device Compiler to your Home Assistant instance.
- Create Your First Configuration: Use the built-in wizard to generate a basic YAML configuration file tailored to your device.
- Compile and Flash the Firmware: Use a USB cable to upload the firmware to your microcontroller.
- Enable Over-the-Air (OTA) Updates: After the initial setup, all future firmware updates can be performed wirelessly via Wi-Fi.
With this setup, you’re ready to customize and expand your thermostat’s functionality with ESPHome.
Sample ESPHome Configuration for DIYLESS products
Here’s an example of a simple ESPHome configuration for DIYLESS Thermostat products, including the setup for temperature sensors, switches for controlling heating modes, and integration with the OpenTherm system. This sample will help you get started with custom firmware, whether you are using DIYLESS Thermostat 1/2/3, or another DIYLESS thermostat model.
LVGL Configuration sample for Display UI

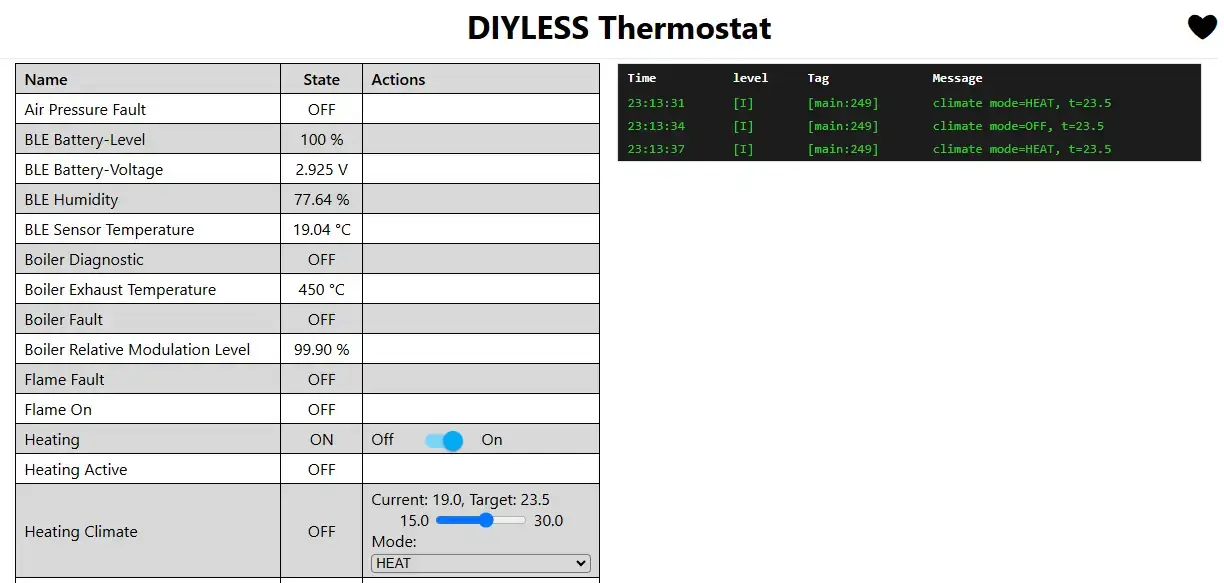
Web Server Configuration sample
Ready to use ESPHome yaml configuration files:
Basic ESPHome Components
esphome:
  name: diyless-thermostat
  friendly_name: DIYLESS Thermostat

esp32:
  board: esp32dev
  framework:
    type: arduino

# Enable logging
logger:
  level: INFO

# Enable Home Assistant API
api:
  encryption:
     key: "	<your key>"

# Enable Over-The-Air (OTA) platform to remotely install modified/updated firmware
ota:
 - platform: esphome
   password: ""

wifi:
  ssid: !secret wifi_ssid
  password: !secret wifi_password

  # Enable fallback hotspot (captive portal) in case wifi connection fails
  ap:
    ssid: "DIYLESS Thermostat"
    password: ""

# Enable captive portal as fallback mechanism for when connecting to the configured WiFi fails.
captive_portal:

# Enable simple web server to remotelly control the device using web interface
web_server:

# Enable OpenTherm communication
opentherm:
  in_pin: 21 # WeMos D1 Mini ESP32 input pin for stacking with Master OpenTherm Shield
  out_pin: 22 # WeMos D1 Mini ESP32 output pin for stacking with Master OpenTherm Shield
You need to:
- Specify API key for the created device to enable communication with Home Assistant.
- Check Wi-Fi credentials in your secrets.yaml file.
- Check OpenTherm pins configuration for your module. ESPHome OpenTherm component documentation
Components captive_portal and web_server are optional.
Choosing a Room Temperature Sensor
The next step is to decide which room temperature sensor to use for your thermostat. ESPHome supports a wide range of sensors, so you have plenty of flexibility. To make it easier, we’ve prepared two options as examples:
1. Wired DALLAS DS18B20 sensor
The DALLAS DS18B20 is a reliable and precise temperature sensor that works seamlessly with ESPHome.
If you choose this option, the Master OpenTherm Shield has a designated spot where you can solder the sensor.
Recommendation: Instead of soldering the DS18B20 sensor directly onto the shield, use wires to place the sensor further away from the ESP32 chip. This helps prevent inaccurate temperature readings caused by the heat generated by the chip during operation.
This wired solution is perfect if you’re looking for a stable, low-latency connection with no reliance on batteries or wireless communication.
#Enable 1-Wire bus for DS18B20 temperature sensor
one_wire:
    - platform: gpio
        pin: 14 # WeMos D1 Mini ESP32 1-wire pin for stacking with Master OpenTherm Shield

# Wired DALLAS DS18B20 sensor
sensor:
    - platform: dallas_temp
        id: dallas_sensor
        name: "Wired Sensor Temperature"
        update_interval: 30s
        accuracy_decimals: 2
        filters:
        - sliding_window_moving_average:
            window_size: 5
            send_every: 2
        - heartbeat: 1s
2. Bluetooth Xiaomi Temperature and Humidity sensor
Another excellent option is the Xiaomi Bluetooth Temperature and Humidity Sensor, which offers wireless convenience and added humidity monitoring.
This compact and affordable sensor integrates seamlessly with ESPHome after some customization.
Setup Requirements:
To use this sensor with your DIYLESS thermostat, you’ll need to flash custom firmware onto the ESP32 device, as described in this guide.
This enables your thermostat to communicate with the Bluetooth sensor and retrieve temperature and humidity data in real time.
This option is ideal if you prefer a wireless sensor that can be easily placed anywhere in the room, ensuring accurate readings without being affected by the heat of the thermostat’s hardware.
# Enable tracking bluetooth low energy devices using your ESP32 node.
esp32_ble_tracker:

# Xiaomi Bluetooth Temperature and Humidity sensor with custom firmware
# https://esphome.io/components/sensor/xiaomi_ble#lywsd03mmc
sensor:
    - platform: pvvx_mithermometer
        id: pvvx_thermometer
        mac_address: "A4:C1:38:XX:XX:XX" #your sensor MAC
        temperature:
        name: "BLE Sensor Temperature"
        id: ble_sensor
        humidity:
        name: "BLE Humidity"
        battery_level:
        name: "BLE Battery-Level"
        battery_voltage:
        name: "BLE Battery-Voltage"
Whether you go for the wired DS18B20 sensor or the Bluetooth Xiaomi sensor, both options provide excellent functionality and compatibility with your ESPHome-powered thermostat. Choose based on your preference for wired stability or wireless flexibility!
Switches Configuration
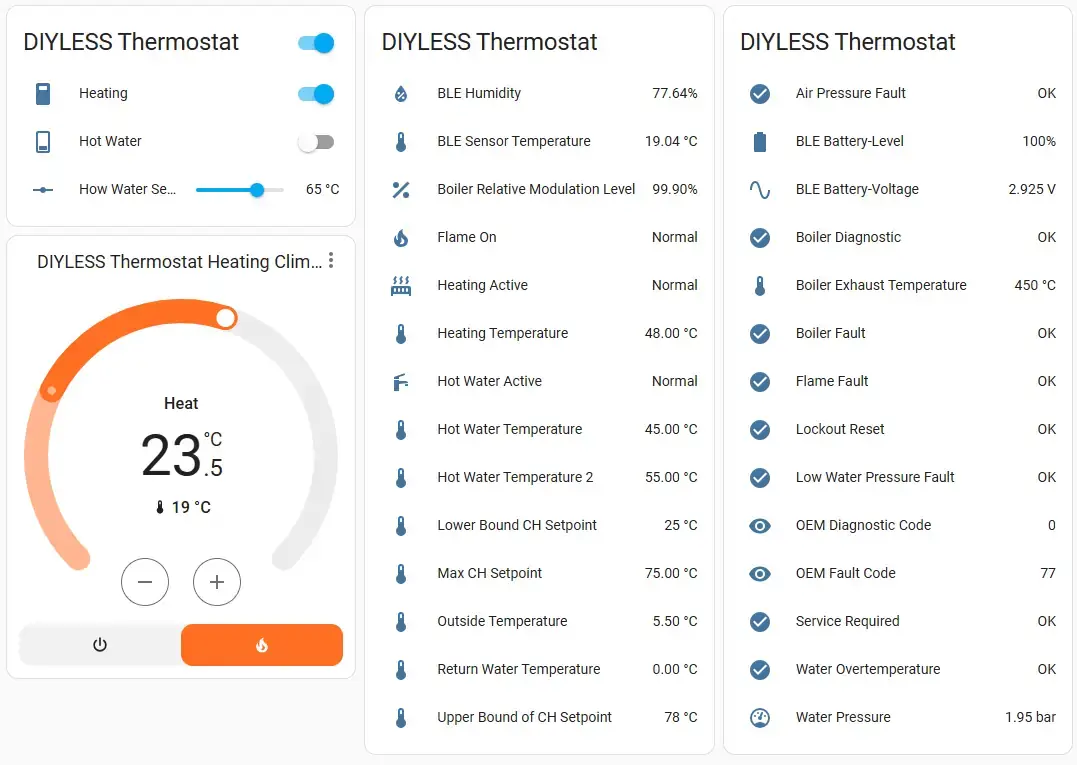
One of the essential features of your thermostat is the ability to control your central heating and hot water system. With ESPHome, you can easily configure switches to manage these functions directly from your smart home platform.
# Use switches to enable/disable central heating and hot water from HA interface
# https://esphome.io/components/opentherm.html#switch
switch:
  - platform: opentherm
    ch_enable:
      id: ch_enable
      name: "Heating"
      restore_mode: RESTORE_DEFAULT_OFF
      internal: false
    dhw_enable:
      id: dhw_enable
      name: "Hot Water"
      restore_mode: RESTORE_DEFAULT_OFF
Numbers/Outputs Configuration
The next essential feature for your DIYLESS thermostat is the ability to set the target temperatures (setpoints) for both central heating and hot water. ESPHome’s Number component is perfect for this, allowing you to adjust setpoints directly from the Home Assistant interface.
# Use numbers or outputs to control numerical values like CH/DHW setpoint from HA interface
# https://esphome.io/components/opentherm.html#numerical-values
number:
  - platform: opentherm
    t_set:
      id: ch_setpoint
      name: "Heating Setpoint"
      step: 1
      min_value: 30
      max_value: 80
      restore_value: true
      initial_value: 60
  - platform: opentherm
    t_dhw_set:
      id: dhw_setpoint
      name: "How Water Setpoint"
      step: 1
      min_value: 30
      max_value: 80
      restore_value: true
      initial_value: 60
If you want your thermostat to calculate the central heating setpoint automatically using a custom algorithm, the Output component in ESPHome is the way to go. This allows you to dynamically adjust the setpoint based on factors like indoor and outdoor temperatures or heating demand.
# Use outputs to control numerical values like Central Heating setpoint using some automatic algorithms
output:
  - platform: opentherm
    t_set:
      id: ch_setpoint
      min_value: 30
      max_value: 80
      zero_means_zero: true

number:
  - platform: opentherm
    t_dhw_set:
      id: dhw_setpoint
      name: "How Water Setpoint"
      step: 1
      min_value: 30
      max_value: 80
      restore_value: true
      initial_value: 60
Binary Sensors Configuration
Binary sensors are invaluable for monitoring the on/off states of your boiler and thermostat. With ESPHome, you can configure binary sensors to track key statuses such as:
- Central Heating (CH) Active
- Domestic Hot Water (DHW) Active
- Flame On
- Fault Indication
- Diagnostic Indication
- and many others...
# Use binary sensors (on/off) to monitor the states and conditions of different boiler entities.
# https://esphome.io/components/opentherm.html#binary-sensor
binary_sensor:
  - platform: opentherm
    ch_active:
      id: ch_active
      name: "Heating Active"
    dhw_active:
      id: dhw_active
      name: "Hot Water Active"

    flame_on:
      id: flame_on
      name: "Flame On"
    fault_indication:
      id: fault_indication
      name: "Boiler Fault"
      entity_category: diagnostic
    diagnostic_indication:
      id: diagnostic_indication
      name: "Boiler Diagnostic"
      entity_category: diagnostic
    service_request:
      name: Service Required
      entity_category: diagnostic
Numeric Sensors Configuration
Numeric sensors are essential for monitoring real-time values from your boiler and thermostat, such as:
- Central Heating (CH) Temperature
- Domestic Hot Water (DHW) Temperature
- Modulation Level
- Outside Temperature
- Water Pressure
- and many others...
sensor:
# OpenTherm sensors
# https://esphome.io/components/opentherm.html#sensor
- platform: opentherm
  t_boiler:
    id: ch_temperature
    name: "Heating Temperature"
  t_dhw:
    id: dhw_temperature
    name: "Hot Water Temperature"

  rel_mod_level:
    id: rel_mod_level
    name: "Boiler Relative Modulation Level"
  t_outside:
    name: Outside Temperature
  t_ret:
    name: Return Water Temperature

  ch_pressure:
    name: Water Pressure
    entity_category: diagnostic
Climate Control Configuration
The PID Climate component in ESPHome enables precise control of your heating system by automatically calculating the optimal boiler central heating setpoint. By adjusting the boiler setpoint based on the difference between the actual and target room temperatures, it maintains comfort while minimizing energy consumption.
Key Benefits:
- Energy Efficiency: Keeps the boiler setpoint as low as possible, reducing energy usage.
- Enhanced Comfort: Maintains the desired room temperature smoothly, avoiding fluctuations.
- Customization: Allows fine-tuning of control parameters to match specific heating system characteristics.
By integrating the PID Climate component, your thermostat can intelligently manage heating demands, ensuring a comfortable environment and efficient boiler operation.
# Use PID Climate component for automatic boiler setpoint calculation
# https://esphome.io/components/climate/pid
climate:
  - platform: pid
    id: ch_climate
    name: "Heating Climate"
    heat_output: ch_setpoint
    default_target_temperature: 23
    sensor: ble_sensor #ble_sensor|dallas_sensor
    visual:
      min_temperature: 15
      max_temperature: 30
      temperature_step:
        target_temperature: 0.5
        current_temperature: 0.1
    control_parameters:
      kp: 0.77
      ki: 0.0005
      kd: 0
      output_averaging_samples: 10
Tune PID Parameters
The PID controller uses the Proportional (Kp), Integral (Ki), and Derivative (Kd) parameters to calculate the boiler setpoint:
- Kp: Adjusts the output based on the current temperature difference.
- Ki: Corrects cumulative errors over time.
- Kd: Reacts to changes in the temperature difference.
Note: For systems with significant delays, such as central heating boilers, the Derivative (Kd) term in PID control often does not add value and can introduce instability.
Instead, we focus on using only the Proportional (Kp) and Integral (Ki) terms for smoother and more reliable control.
Start with the values provided above and adjust them iteratively to achieve smooth temperature control without overshooting or oscillation.
Buttons Configuration
If you're using the DIYLESS Thermostat 2, you can easily configure physical buttons to control various aspects of the thermostat, such as increasing or decreasing the Central Heating (CH) and Domestic Hot Water (DHW) setpoints, as well as switching between different thermostat modes (e.g., heating, eco, off). This adds a layer of manual control to the system, making it more versatile and user-friendly.
# Use binary sensors (on/off) to read the thermostat buttons state
binary_sensor:
  - platform: gpio
    id: button_page
    pin:
      number: 4
      mode:
        input: true
        pullup: true
  - platform: gpio
    id: button_mode
    pin:
      number: 2
      mode:
        input: true
        pullup: true

  - platform: gpio
    id: button_up
    pin:
      number: 17
      mode:
        input: true
        pullup: true
  - platform: gpio
    id: button_down
    pin:
      number: 35
      mode:
        input: true
        pullup: true
Display Configuration
If you're using the DIYLESS Thermostat 2, you can configure a display to show important information, such as the current room temperature, heating setpoint, DHW setpoint, and thermostat mode. This makes the thermostat more intuitive and easier to use by providing visual feedback directly on the device.
spi:
  clk_pin: GPIO09
  mosi_pin: GPIO11

display:
  - platform: ili9xxx
    id: st7789v_display
    model: st7789v
    data_rate: 20MHz
    rotation: 90
    cs_pin: GPIO38
    dc_pin: GPIO10
    reset_pin: GPIO36
    auto_clear_enabled: false
    update_interval: never
    invert_colors: true
    dimensions:
      width: 240
      height: 240
      offset_height: 0
      offset_width: 0

light:
  - platform: monochromatic
    id: backlight
    name: Thermostat Backlight
    output: backlight_output
    restore_mode: ALWAYS_ON
    default_transition_length: 0s
UI Interface Configuration
For DIYLESS Thermostat 2/3, you can take advantage of the LVGL (Light and Versatile Graphics Library) to create a visually appealing and interactive user interface. LVGL enables you to design dynamic touchscreens, control elements, and custom graphics that can make the thermostat interface more user-friendly and visually appealing.
# Use LVGL component for UI interface configuration
# https://esphome.io/components/lvgl/index.html
lvgl:
  buffer_size: 25%
  displays:
    - st7789v_display
  disp_bg_color: black
  text_color: white
  pages:
    - id: ch_page
      bg_opa: TRANSP
      widgets:
        - arc:
            id: ch_setpoint_arc
            align: CENTER
            y: 10
            adjustable: true
            value: 50
            min_value: 50
            max_value: 300
            width: 210
            height: 210
            arc_width: 16
            arc_color: 0x292929
            indicator:
              arc_color: 0xFF6F22
              arc_width: 16
            knob:
              bg_color: 0xFFFFFF
        - label:
            id: ch_action_label
            align: CENTER
            y: -40
            text_font: montserrat_14
            text: "--"
        - label:
            id: ch_setpoint_label
            align: CENTER
            text: "--.-°"
            y: 0
            text_font: montserrat_48
        - label:
            id: ch_temperature_label
            align: CENTER
            text: "--.-°"
            text_font: montserrat_24
            text_color: 0xFF6F22
            y: 50
        - label:
            id: ch_mode_label
            align: CENTER
            y: 90
            text_font: montserrat_14
            text: "OFF"
            border_color: 0xFFFFFF
            border_width: 1
            pad_top: 2
            pad_bottom: 2
            pad_left: 8
            pad_right: 8
The combination of DIYLESS products and the flexibility of ESPHome results in a robust, customizable solution for anyone looking to dive into home automation and energy management. Whether you're a DIY electronics enthusiast or someone who simply wants to make a smart home more efficient, building your own thermostat firmware using ESPHome offers a hands-on approach that puts you in full control of your heating and cooling system.
